What’s Eye Relief?
Eye relief is the distance between your eye and the eyepiece of your rifle scope. Get it right, and you’ll see the full field of view without any dark spots or weird blackouts. Get it wrong, and you’ll be squinting or even injuring yourself when the rifle kicks back. It’s a simple thing, but it makes a huge difference to your shooting comfort and accuracy.
When you mount your scope, make sure it’s in the right spot. When you bring the rifle up to aim, you want to see everything clearly without having to shift your head forward, back, or sideways. If you’re dealing with vignetting (those dark edges around your view), you’re doing something wrong and might be way off target.
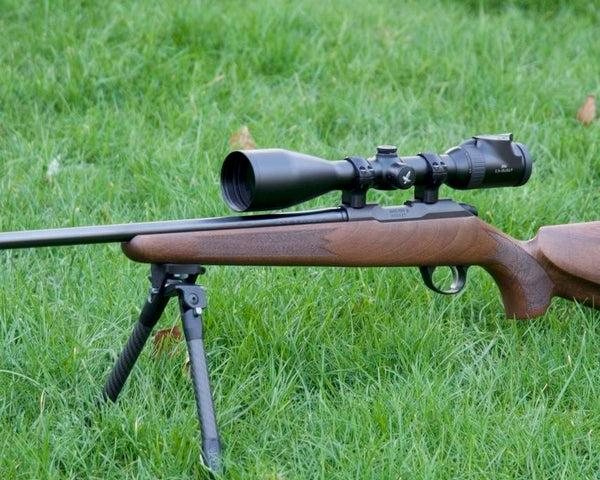
Before purchasing a scope, always check the specs for eye relief. Most modern scopes give you about 3 to 5 inches of space, which is plenty to work with. But keep in mind, high-magnification scopes, older models, or those designed for rimfire rifles might offer less eye relief.
Why Is Proper Eye Relief Important?
Eye relief is crucial for keeping your shots accurate and fast. Whether you’re hunting, target shooting, or competing, the last thing you want to do is fumble with your head position every time you bring the rifle up to aim. Getting a full sight picture means your head and cheek weld are in the right spot, lined up with the scope.
But don’t make the mistake of setting the scope too close to your eye. If you’re using a rifle with heavy recoil, a scope set too close can actually injure your eye. Keep the distance at a safe level—anything under two inches could cause problems. And always wear eye protection!
Some new shooters make the mistake of buying a rifle with a scope that’s already mounted, set to someone else’s eye relief. Or maybe they head to a gun shop and adjust their head position instead of moving the scope. That’s a mistake. The scope needs to be set up for you.
How to Test and Adjust Eye Relief
Before you do anything, make sure the rifle is unloaded, the action is open, and you’re following all safety rules (finger off the trigger, rifle pointed safely).
- Crank the Scope to Maximum Magnification: If it’s a variable scope, turn it to the highest magnification for the test.
- Get into Your Shooting Stance: Hold your rifle like you normally would, close your aiming eye.
- Do the Eye Relief Test: Open your aiming eye and look through the scope. If you don’t get a full sight picture, you’ve got to adjust the scope.
If you wear tactical gear or hunting clothes, do the test with your gear on—your clothing and accessories can change your shooting position and affect eye relief.
How to Set Eye Relief on Your Scope
-
Mount the Scope: With your rifle unloaded and action open, mount the scope into the rings. Tighten the rings just enough to hold the scope in place—don’t torque them yet. The scope should move a little but shouldn’t slide around like it’s loose.
-
Wear Your Gear: If you typically shoot with a backpack or tactical gear on, put it on now. This can affect how you position the rifle and the distance between your eye and the eyepiece.
-
Get in Position: Set yourself up the way you would when shooting for real.
-
Set to Maximum Magnification: Crank the scope up to its highest setting if it’s a variable scope.
-
Do the Eye Relief Test Again: With the rifle pointed safely, look through the scope and move it until you get a full sight picture.Look for that “sweet spot” where you’ve got ideal eye relief. There’s usually about an inch or so of wiggle room, but aim for the middle of that range to keep things consistent across different shooting positions.
- Level the Reticle: Once you’ve got the eye relief dialed in, make sure the reticle is level without shifting the scope's position. Then, torque the rings to the manufacturer’s recommended settings.
Why is Torque Important to Scope Rings?
Now, let’s talk about torque. If your scope rings are too loose, the scope can slip inside them after the recoil, or even from bumps or vibrations. Remember, your scope is a precision tool. Even a tiny shift in position can throw your point of impact off by inches—or even feet. That’s a clean shot or a miss right there.
But don’t go overboard either. If you tighten the screws too much, you can damage the scope or even strip the screws, making them impossible to remove when you need to. That’s a real pain.
That’s why scope manufacturers have specific torque recommendations for your rings. The old standard was 20-25 inch-pounds, but with modern lightweight scopes and thinner tubes, some scopes need as little as 15 inch-pounds. Always check the manufacturer’s specs before tightening down those screws.
Other Things to Consider That Can Affect Eye Relief
-
Scope Height: If the scope feels too high and you’re constantly adjusting your cheek weld or eye position, you can probably make it work with some practice. But if you have to lift your cheek off the weld, you might need lower scope rings. If lowering the rings makes the objective bell touch the barrel or messes with bolt action, you might need a cheek riser or adjustable comb to get your cheek weld right.
-
Limited Eye Relief Adjustment: Some rifles and scopes just don’t play well together. If the scope design, the objective bell, or the adjustment dials are in the way, you might not be able to get the eye relief you need. If you’re limited by mounting slots (like with a two-piece base), a Picatinny rail or a different scope might be your best bet.
Get your eye relief and torque set up right, and you’ll have a much more comfortable, accurate shooting experience. No more awkward adjustments or painful recoil—just solid, focused shots.
